Understanding and Caring for Wraps
Mending Long Pulled Threads On Your Woven Wrap

Mending a Pulled Thread
For us, a good wrap is one that really moulds to you and your baby. Being able to hug the contours of your body closely means that it is easier to tighten evenly and remove any pockets of slack that would otherwise get trapped in the carry. It is this slack that gradually gathers together and creates movement and sagging in your wrap job, causing discomfort. Removing it at the start allows you to still be comfortable hours after you first tied the wrap!
Our looser, Alchemy weave makes our wraps particularly soft and mould-able. The individual threads can move independently of each other so that each can get into the optimal position for offering support. The flip side is that these more mobile threads can more easily pull out of place and so knowing how to cope when this happens is really helpful. Knowledge is power!
As prevention is better than cure, it is worth knowing what you can do to avoid pulls in the first place. Over time the threads get to know their place within the structure of the weave, they settle in and bond with their neighbours which discourages them from straying. Wraps need to be washed and worn in order for this to happen. The more you wear the hardier they become, the more protected from snags and pulls. Wraps sat looking pretty on the shelf will always be more delicate and require more precious handling, but wraps that receive your attention and get plenty of use will reward your love handsomely!
Small pulls can be worked back into place with a pin (tutorial for this is on its way) but this is a tutorial for how we recommend dealing with a really long pulled warp thread. The warp runs the length of the wrap and there are thousands of fine warp threads. Weft threads run from rail to rail. There are fewer of those and they are thicker, so we deal with those in the same way as a small pull. Weft threads are less prone to long pulls though.
Have you ever noticed how a very long pull can seem to magic up out of nowhere? It is as if the thread has suddenly become a lot longer, and there is no obvious place in the cloth that it has come from. During weaving, with every pass of the weft thread over the warp, a tiny amount of extra length is woven in. You don’t notice it when evenly distributed over tens of thousands of individual threads, but pull it all into one place and it mounts up. If you’ve got rid of any obvious tightness/ruching/gathering of the cloth along the line of a pulled thread, then there is no need to try and redistribute all that extra length- it’ll be a huge task, and there is no benefit to doing it. It is far easier to simply snip the long pull, then weave the two ends back into the cloth. They don’t need to be knotted together, it is better to leave them to move independently. The two ends will be completely secure in the cloth and won’t work themselves out, but will have the flexibility to allow any extra length to slowly seep back down the thread into the cloth. The area that you snipped will have double the density of threads, so if anything , it will be more secure than before!
1. Firstly you want to get rid of any tension or puckering along the length of the pulled warp thread. You may be able to feel this as a tight thread within the cloth or see it as a darker line along the wrap. Starting at the site of the pull, pinch the cloth between your fingers and wriggle it from side to side. Repeat this action along the cloth in both directions. You may find that some of the pull/thread is worked back into the cloth this way and it shrinks slightly.
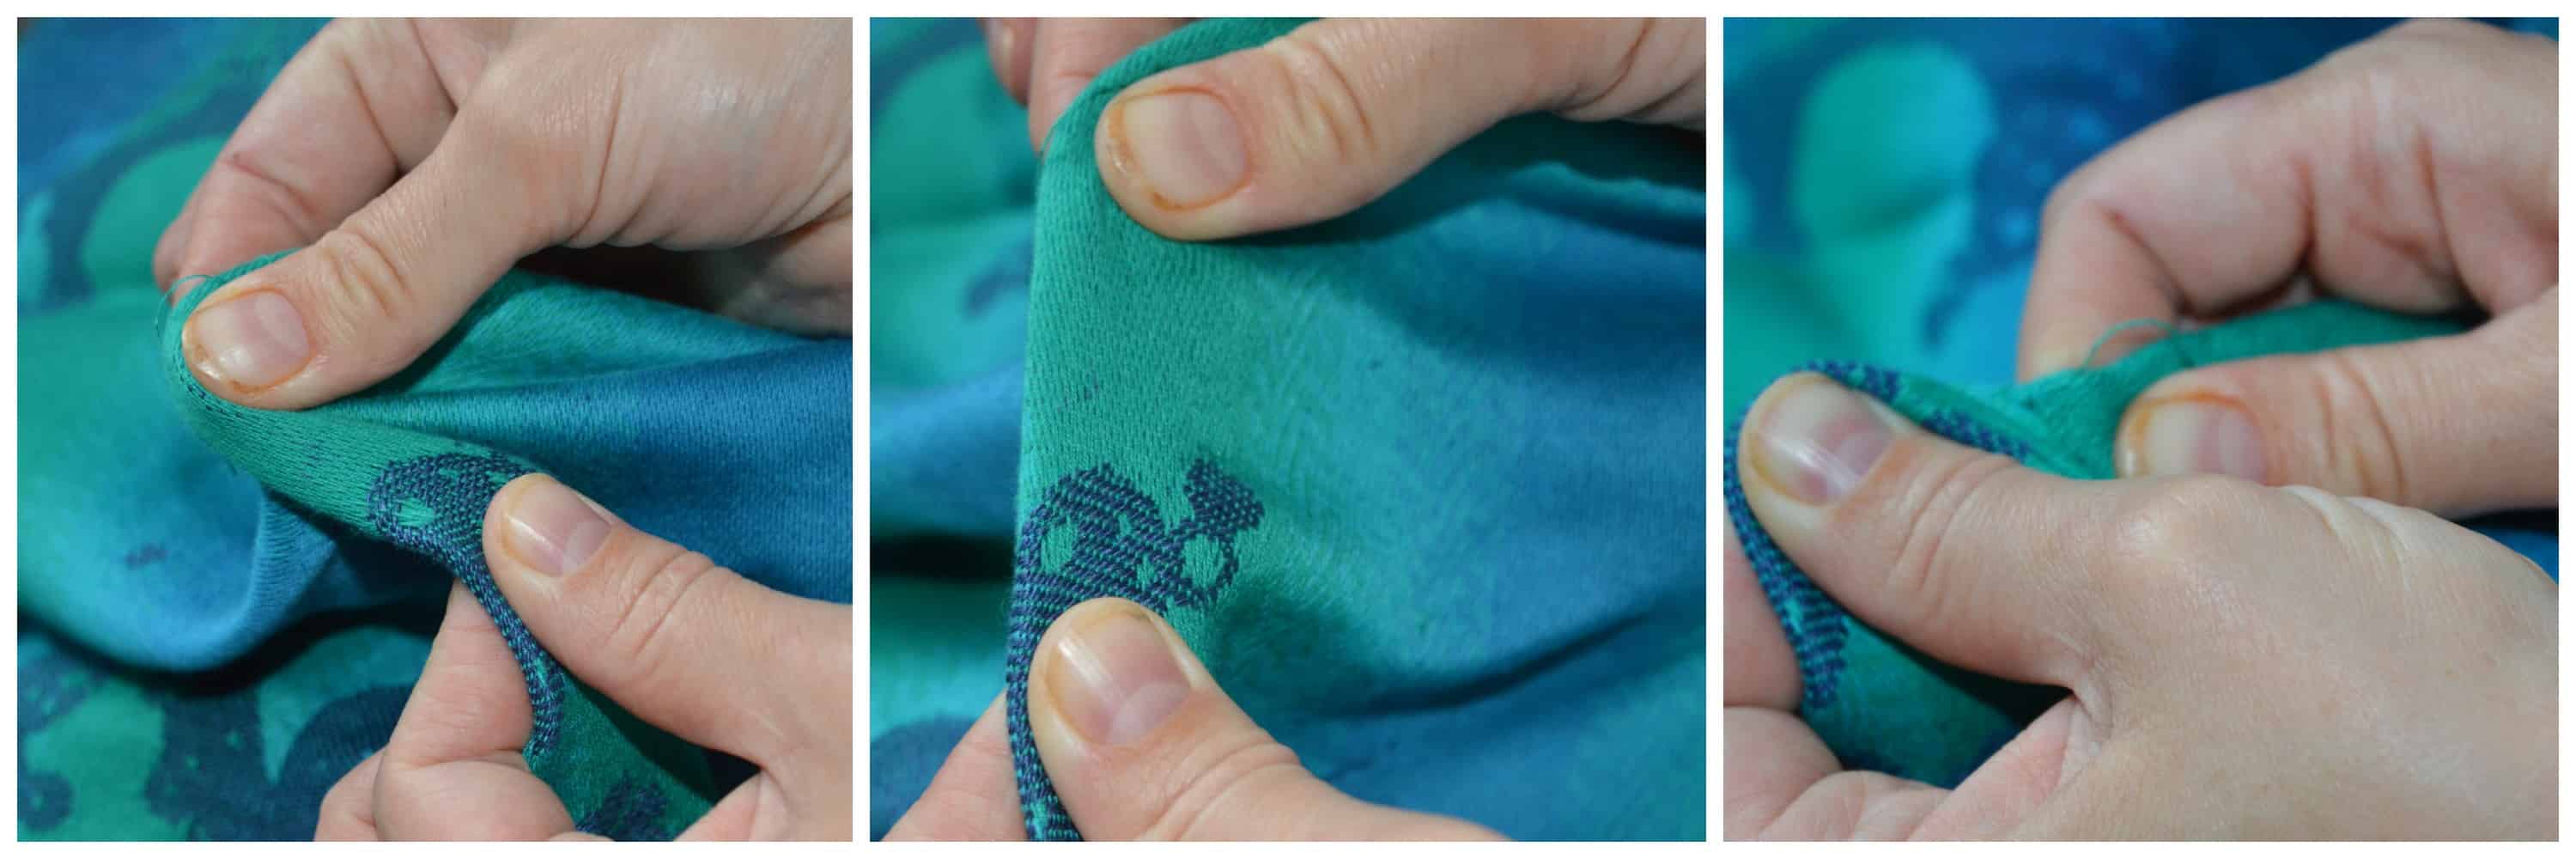
2. Gently extend the thread until taut and snip in the middle to create two separate threads. It really is safe to do this we promise! Woven cloth won’t unravel the way knitting will, and there will be enough friction in the structure of our weave to hold those two ends in place. There is no need for the ends to be fastened to each other.
 3. Starting at the centre of the pull, push the needle through the cloth along the line of the warp thread, and finish up with the eye of the needle level with the thread that you are weaving in.
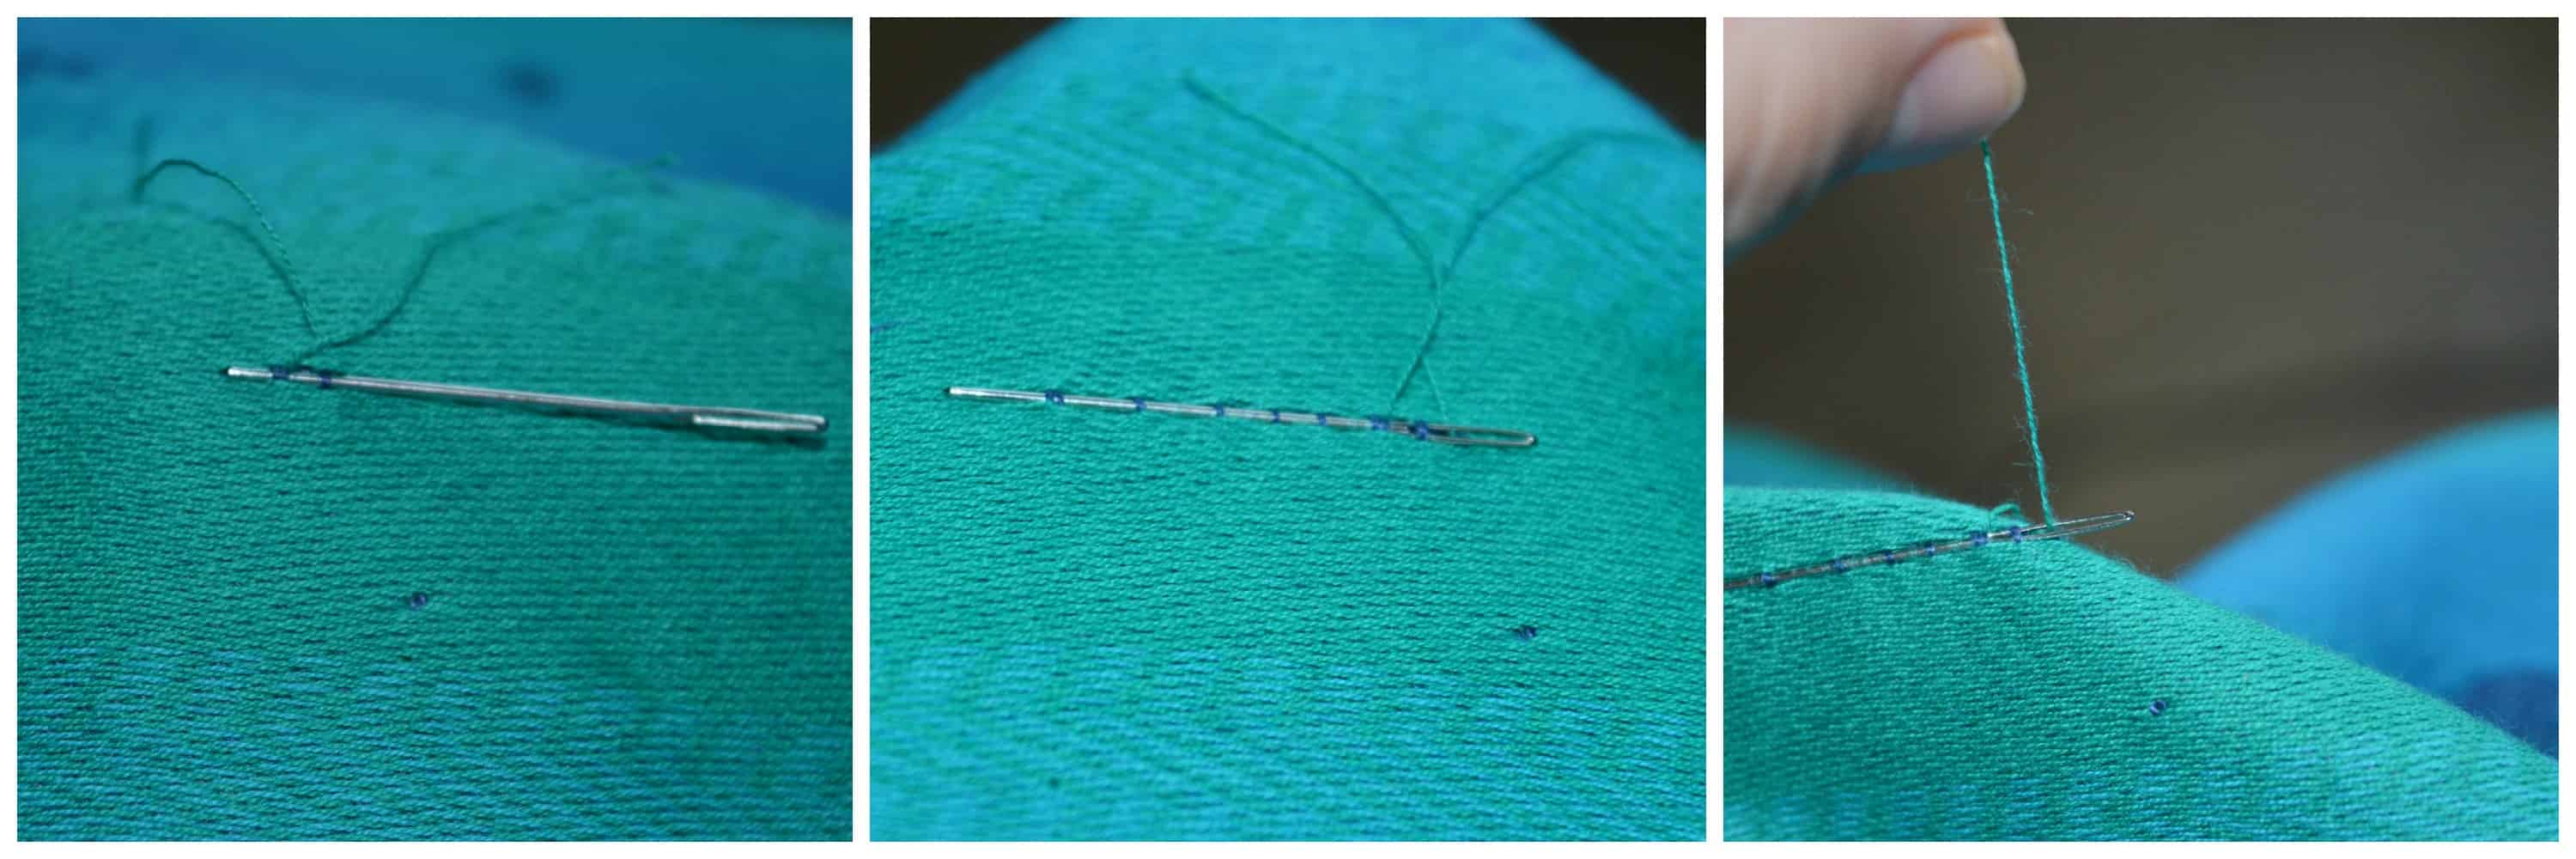
If you look closely at the cloth you can see that the warp and weft are imbalanced so that there is more warp showing on one face of the cloth (the warp face) To emulate this your needle travels over the top of the cloth, then pick out a single weft thread to go under and back on the surface again, rather than an even ‘over-under’ motion. We have gone under two weft threads at a time instead of one on this picture to help you see clearer.
4. Thread the yarn through the eye of the needle then gently pull the needle through the cloth, bringing the warp thread with it. A short thread might not come out the other end along with the needle and the end will nestle into the cloth, hidden, in which case your job is done!
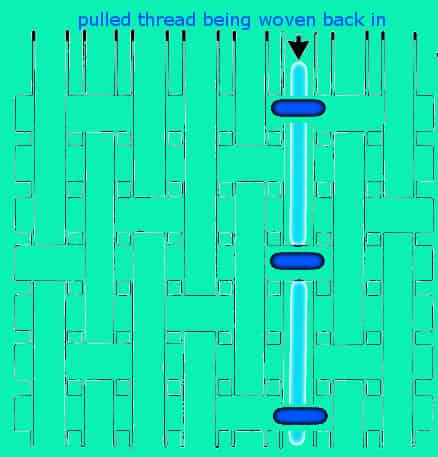
5. The picture below is taken halfway through the process of mending. The left thread is the excess and can be snipped off or you can continue to weave the full length in if you wish. You only need a couple of cm worth of thread woven back in for it to remain stable and secure. The right thread is the other half of the pulled thread still in its original position and is dealt with in the same manner as the first thread but woven in the opposite direction.

It is far simpler to do than it is to describe! Once you have the knack, long pulls need never be a source of concern again and can be fixed safely, invisibly and quickly.